I Have No Developer. Can I Still Run Server-Side Tracking?
No developer, no Google Cloud account, no $3,000 quote. Here's the exact step-by-step process to get server-side tracking running yourself — in under 2 hours.
I Have No Developer. Can I Still Run Server-Side Tracking?
Short answer: yes.
Longer answer: it depends on how you try to do it.
There are two ways to set up server-side tracking. One requires a developer. The other doesn't. Most of the content online describes the first way - which is why you've probably convinced yourself this isn't something you can handle alone.
This post is about the second way.
Why Everyone Thinks You Need a Developer
When server-side Google Tag Manager first launched, the setup process looked like this:
You'd create a Google Cloud Platform account. Set up a Cloud Run service. Configure a Docker container. Connect a custom domain. Handle SSL certificate provisioning. Set up auto-scaling so your server doesn't die during a traffic spike. Configure monitoring so you know when something breaks. Then — only after all of that — you'd actually start working on the tracking itself.
That's genuinely a developer job. It's not that the steps are impossible for a non-technical person to learn, it's that there are 40 of them, they happen in a specific order, and getting one wrong means starting over. A proper GCP setup takes 50 to 120 hours to do correctly. If you hired an agency for this, you'd pay $6,000 to $14,000 before a single conversion event fired.
So the developer requirement was real. It was just real for a specific version of the setup — the DIY infrastructure version.
That version is no longer the only option.
What Changed
Managed sGTM hosting platforms now exist specifically to solve this problem. Instead of you building and maintaining the server, the platform does it. You get a server-side GTM container up and running without touching Google Cloud, configuring Docker, or worrying about SSL certificates.
Think of it like the difference between building your own e-commerce site from scratch versus using Shopify. Could you theoretically build your own? Yes. Is Shopify the right choice for 99% of store owners? Also yes.
Managed sGTM hosting is Shopify for server-side tracking infrastructure.
What you're left with - after the hosting is handled - is the GTM configuration. That's learnable. It's the same Google Tag Manager interface you may already use for your web container. The server-side version adds some new concepts, but nothing that requires a computer science degree.
Here's exactly what the process looks like — step by step, in the right order.
Step 1: Create Your Server Container in Google Tag Manager
This is where you start — inside GTM, not the hosting platform. Most guides get this order wrong.
Open Google Tag Manager and go to your Web container. In the top-left, click Admin, then click the (+) icon
Give it a name - something like "MyStore - Server". Under Target Platform, select Server.
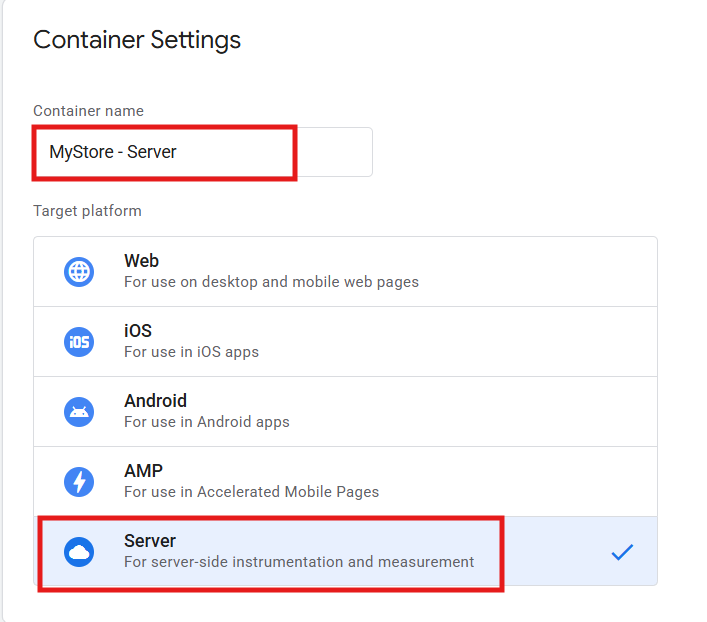
GTM will ask how you want to provision the tagging server. Select "Manually provision tagging server." Do not select the automatic option — that tries to connect to Google Cloud directly, which is the developer route.
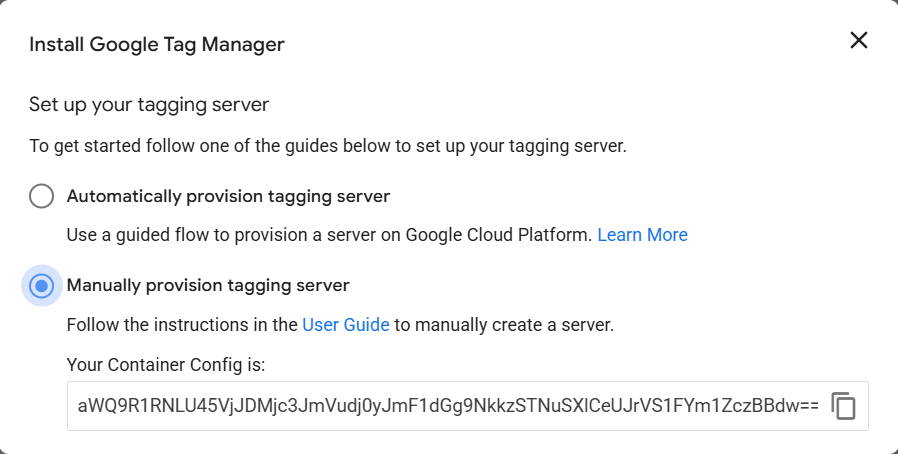
GTM will now generate a Container Config string — a long block of text that looks like random characters. Copy this string and save it somewhere safe — a notes app, a text file, anywhere. You'll need it in the next step.
Leave this GTM tab open.
Step 2: Create Your Container on Servero
Now open Servero.io in a new tab and create a free account. No credit card required.
Once you're in the dashboard, click Create Container. You'll be asked for three things:
Container name — anything descriptive. "MyStore sGTM" works. It doesn't need to match the name you used in GTM.
Container Config — paste the string you copied from GTM in Step 1
Server location — choose the region closest to where most of your customers are. US, EU, or Asia. This affects latency and, for EU customers, data residency.
Click Create Container.
Servero will now provision your server infrastructure automatically — this takes approximately 5 minutes. You'll see the container status update to "Running" when it's ready.
You don't configure anything on Google Cloud. No billing account, no Cloud Run setup, no Docker. The platform handles all of it. You're done with the infrastructure.
Step 3: Add Your Custom Domain
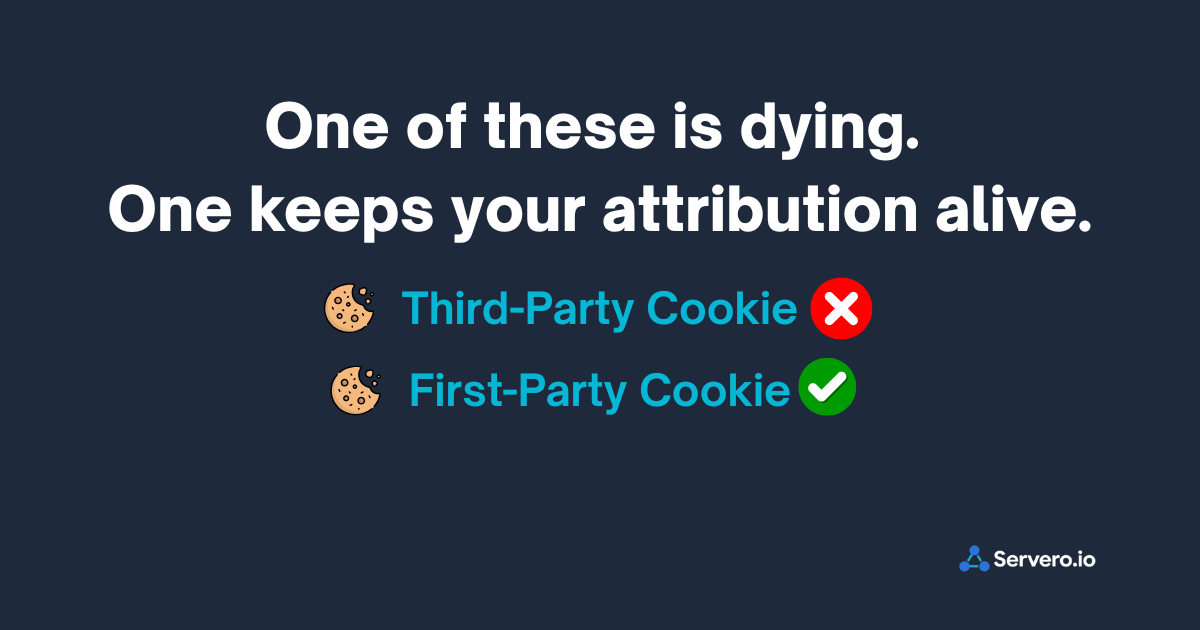
Your sGTM container needs to run on a subdomain of your own website — something like data.yourstore.com or track.yourstore.com. This makes it first-party: browsers and ad platforms see the tracking as coming from you, not a third party.
In your Servero dashboard, open your container and go to Domains → Add Custom Domain.
Enter the subdomain you want to use — for example, data.yourstore.com.
Servero will display a CNAME record to add — it looks like this:
Type:   CNAME
Host:   data
Value:  containers.servero.io
TTL:    Auto
Now open your DNS settings in a new tab. Every registrar is slightly different but the process is identical:
GoDaddy: My Products → DNS → Add Record
Namecheap: Domain List → Manage → Advanced DNS → Add New Record
Cloudflare: Select domain → DNS → Add Record (turn proxy OFF — grey cloud, not orange)
Shopify Domains: Online Store → Domains → DNS Settings → Add Record
Copy the record exactly as shown in your Servero dashboard. Save it.
DNS propagation takes anywhere from 10 minutes to a few hours. Servero will email you when the domain is verified. You can continue with the next steps while you wait.
Step 4: Connect the Custom Domain Back to GTM
This is the step most setup guides leave out entirely — and it's what completes the link between your GTM server container and your hosting.
Go back to your GTM server container (not your web container — the server one you created in Step 1).
Click Admin → Container Settings.
Add URL → In the Server container URLs field, enter your full custom domain:
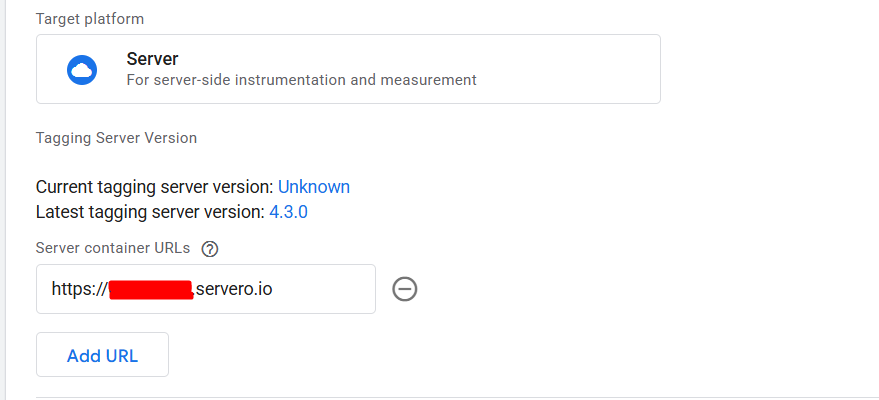
Make sure the format is exact:
✅
https://data.yourstore.com❌
https://data.yourstore.com/— no trailing slash❌
data.yourstore.com— must include https://
Save the container settings.
This tells GTM: "when you need to send or receive data, use this server URL." Without this step, your GTM server container doesn't know where it's actually running.
Step 5: Add event_id to Your Web Container Tags
Before setting up the server-side CAPI tag, you need to wire up deduplication in the web container. This is important — it prevents Meta from double-counting the same purchase reported by both your Pixel and your CAPI.
Get the Event ID variable:
In your web GTM container, go to Variables in the left sidebar. Scroll to the very bottom and click "Discover more variable types in the Community Template Gallery."
Search for Event ID. You'll find a ready-made template. Click it and add it to your workspace.
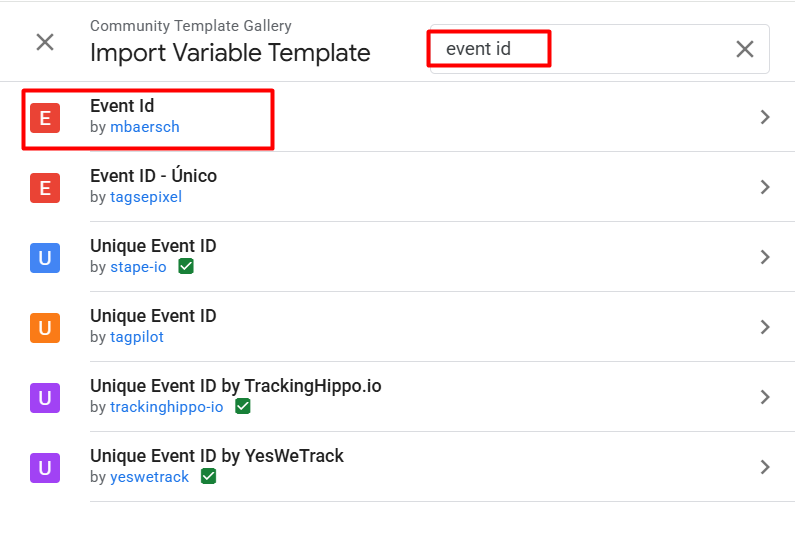
No JavaScript needed. No manual setup. The template creates a variable that generates a unique, consistent ID for each purchase event.
Add event_id to your Meta Pixel tag:
Open your Meta Pixel purchase tag in the web container. In the event parameters section, add:

Add event_id to your GA4 purchase event tag:
Open your GA4 purchase event tag in the web container. In the event parameters section, add the same thing:
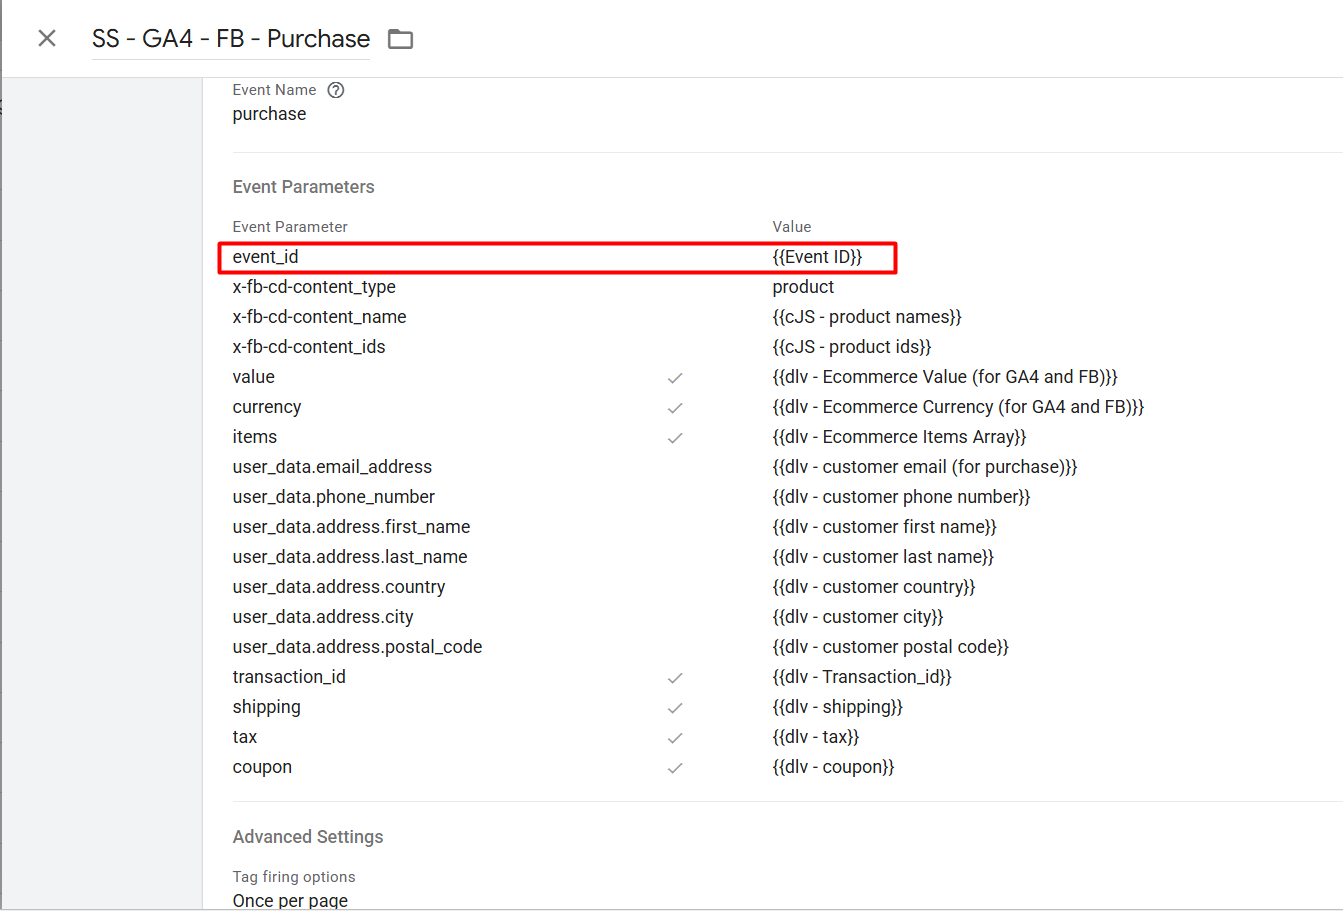
This second step is the key one. The GA4 tag is what sends all your event data to the server container — including this event_id. Your server container receives it automatically and passes it to Meta's CAPI. No separate setup needed on the server side.
Save both tags. Do not publish yet.
Step 6: Update Your GA4 Configuration Tag
This is what turns on server-side routing. Right now, your website sends events directly from the browser to Google's servers. After this step, they go to your server container first.
In your web GTM container, find your Google Analytics 4 Configuration tag - the one with your G-XXXXXXXXXX Measurement ID.
Open it. Expand the Configuration settings and click on Add parameter. In the right field, write server_container_url, and in the left field, paste the server url:
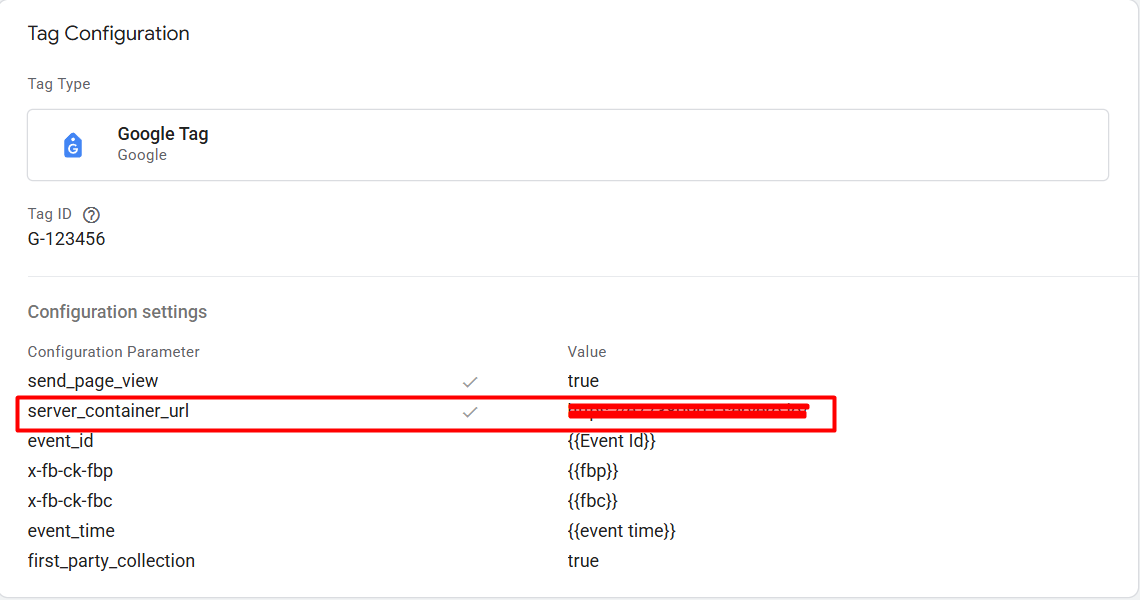
Save the tag.
What this does: every GA4 event your website fires - page views, purchase events, everything - now goes to your server container first. Your server then forwards it to GA4, to Meta CAPI, and to any other platform you've configured.
Your server is now the hub. Everything flows through it.
Publish the web container once you've saved both this tag and the event_id tags from Step 5.
Step 7: Set Up Meta CAPI in the Server Container
Now switch to your GTM server container.
Click New Tag. In the tag template gallery, search for Facebook Conversions API. If it's not already in your workspace, add it from the gallery first, then select it.
Fill in your credentials:
Pixel ID — found in Meta Events Manager → your Pixel → Settings
API Access Token — generate this in Meta Events Manager → your Pixel → Settings → Conversions API → Generate Access Token
Set the Event Name Setup Method to "Inherit from client."
Create the trigger:
Create a trigger that fires when the Event Name equals Purchase.
This tells the CAPI tag to fire specifically on purchase events arriving from your web container.
Save the tag.
Publish the server container — this is completely separate from the web container publish. Both need their own publish step. The server container will not go live until you do this.
Step 8: Verify Everything Is Working
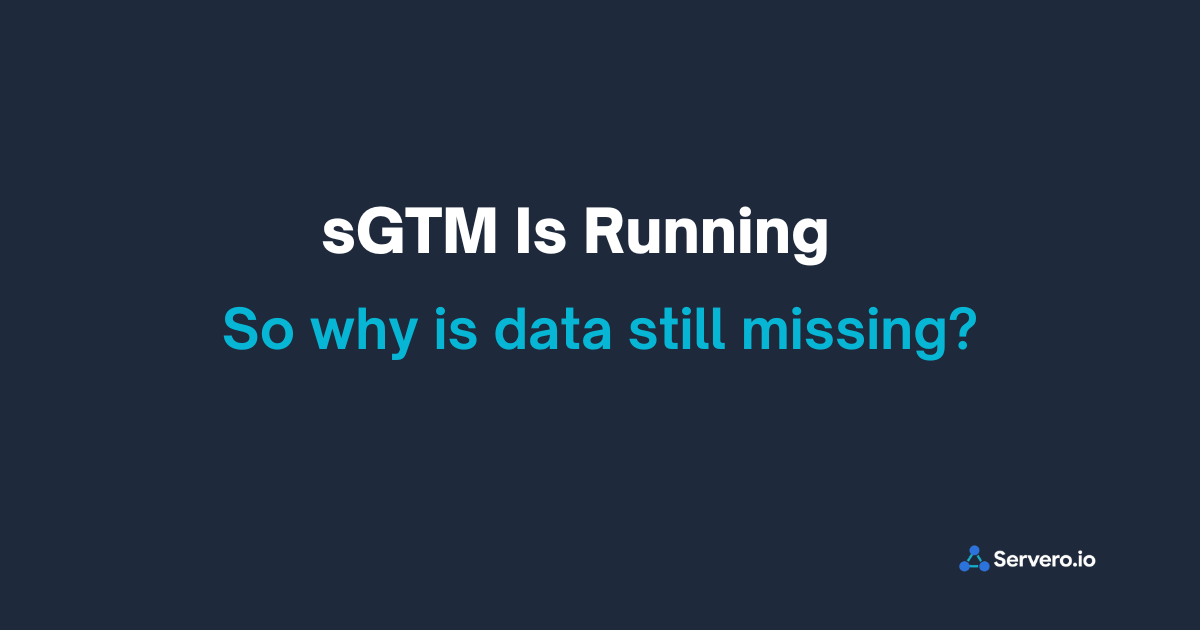
Don't skip this. A setup that looks complete but has a broken link somewhere silently loses conversion data.
Check 1 — GTM Server Container Preview:
In your GTM server container, click Preview. Open your store in a new tab and complete a test purchase (use a Shopify test payment or a 100% discount code).
In the server preview, you should see:
A purchase event arriving at the server container ✅
The Facebook CAPI tag firing on that event ✅
event_idvisible in the event data ✅
If no events arrive → the Server Container URL in your GA4 Configuration tag is either wrong or your custom domain hasn't verified yet. Wait 15 minutes and try again.
Check 2 — Meta Events Manager Test Events:
Go to Meta Events Manager → your Pixel → Test Events.
Enter your store URL, start the test, complete a purchase.
You should see:
Purchase event received ✅
Source: Server ✅
Parameters including value, currency present ✅
User data fields present (shown as hashed) ✅
If you only see Source: Browser — the CAPI tag isn't reaching Meta. Check that your server container is published and the trigger is firing in server preview.
Check 3 — Event Match Quality:
In Events Manager, click on your Purchase event and look at the Event Match Quality score.
A fresh setup typically starts at 5–7. It improves over the following days as real customer data flows through. If it starts below 5, check that the customer email and phone are populating from your Shopify checkout data layer into the GA4 event parameters.
Check 4 — Deduplication:
In Test Events, after a test purchase, you should see:
One Browser event (from your Meta Pixel)
One Server event (from CAPI)
Conversion count = 1, not 2
If the count shows 2 — the event_id Value aren't matching between Pixel and CAPI. Go back to Step 5 and confirm the Event ID variable is added to both the Meta Pixel tag and the GA4 event tag in the web container.
Common Things That Trip People Up
No events arriving in server container preview → The Server Container URL in your GA4 Configuration tag doesn't match your custom domain exactly. Check for a missing https:// or an accidental trailing slash. Also confirm your custom domain shows as Verified in the Servero dashboard.
Container status shows "Error" instead of "Running" → The Container Config you pasted into Servero is incorrect or incomplete. Go back to GTM → your server container → Admin → Container Settings → copy the full Container Config string again and update it in Servero.
CAPI events in Events Manager but count is far below Pixel events → Your trigger is too narrow. Make sure the CAPI tag trigger fires on all Purchase events — not a specific subset.
Event Match Quality is stuck below 5 → Customer data isn't populating. In GTM Server Preview, click on the CAPI tag firing on a test purchase and inspect the event data. If email and phone fields are empty, your Shopify checkout data layer isn't pushing customer data into the GA4 event parameters. This is a data layer issue, not a server container issue.
Conversions being double-counted → The event_id isn't matching between Pixel and CAPI. Confirm the Event ID variable from the Community Template Gallery is added to both your Meta Pixel purchase tag AND your GA4 purchase event tag in the web container. Both must use the same variable — {{Event ID}}.
Everything worked in preview but nothing in production → You published the web container but not the server container. They are separate. Go to your GTM server container workspace → Submit → Publish.
How Long Does This Actually Take?
For a Shopify or WooCommerce store, a complete setup — managed hosting, custom domain, web container updates, Meta CAPI — takes between 45 minutes and 2 hours the first time.
Most of that time is reading, double-checking, and waiting for DNS to propagate. The actual steps are short.
The second time you do this — for a second store or a client — it takes 20 minutes.
What You Don't Need to Figure Out Alone
The assumption that server-side tracking requires a developer came from a real place. The old way — building on GCP, managing Cloud Run, handling SSL manually — is genuinely complex infrastructure work.
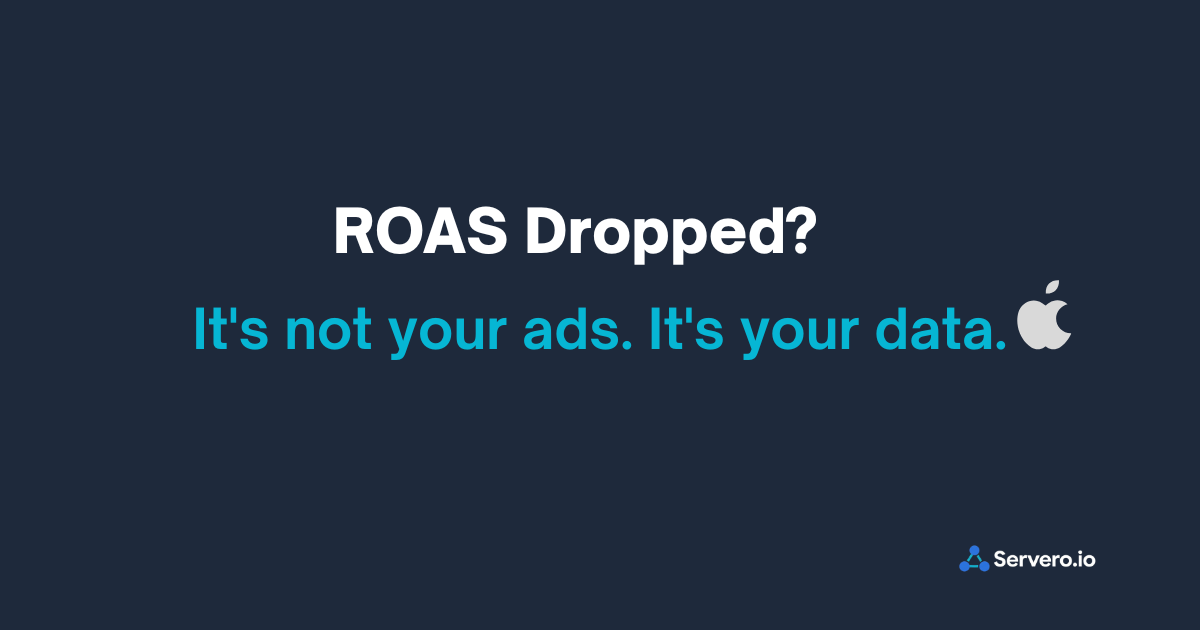
But that version exists for people who want maximum control over every layer of the system. Most marketers don't need that. They need their Meta conversions to be accurate and their ROAS to reflect reality.
That problem is now solvable without a developer, without a $3,000 quote, and without three weeks learning Google Cloud. It takes the right hosting platform, the right steps in the right order, and an hour of focused work.
You have the hour. The rest is just following the steps.
Ready to get started? [Set up your free container on Servero — no GCP account, no credit card needed →]